基于Facenet-pytorch框架快速实现简单demo
在准备今年的计挑赛人工智能的时候,注意到有不少文章有编写基于Facenet-pytorch对两张图像进行比对的方法,浅花点时间跟个风写个简单的demo(不得不说Facenet准确率真顶)。

 制作源码上传至github:
https://github.com/Zichuana/Face-Comparison-System
所用到的主干库,及其对应版本:
Flask                        2.2.1
opencv-python                4.6.0.66
torch                        1.12.1
facenet-pytorch              2.5.2
功能实现
功能实现编写在app.py内,后面会展示目录结构,导入所需库并初始化项目。
from flask import Flask, jsonify, render_template, request
from datetime import timedelta
import cv2
import io
from PIL import Image
import torch
from facenet_pytorch import MTCNN, InceptionResnetV1

app = Flask(__name__, static_url_path="/")

# 自动重载模板文件
app.jinja_env.auto_reload = True
app.config['TEMPLATES_AUTO_RELOAD'] = True
# 设置静态文件缓存过期时间
app.config['SEND_FILE_MAX_AGE_DEFAULT'] = timedelta(seconds=1)
device = torch.device('cuda:0' if torch.cuda.is_available() else 'cpu')
获得人脸特征向量。
def load_known_faces(dstImgPath, mtcnn, resnet):
    aligned = []
    knownImg = cv2.imread(dstImgPath)  # 读取图片
    face = mtcnn(knownImg)  # 使用mtcnn检测人脸,返回【人脸数组】
    print(face)
    if face is not None:
        aligned.append(face[0])
    print(aligned)
    aligned = torch.stack(aligned).to(device)
    with torch.no_grad():
        known_faces_emb = resnet(aligned).detach().cpu()  # 使用resnet模型获取人脸对应的特征向量
    # print("\n人脸对应的特征向量为:\n", known_faces_emb)
    return known_faces_emb, knownImg
计算人脸特征向量间的欧氏距离,设置阈值,判断是否为同一个人脸。
def match_faces(faces_emb, known_faces_emb, threshold):
    isExistDst = False
    distance = (known_faces_emb[0] - faces_emb[0]).norm().item()
    if (distance < threshold):
        isExistDst = True
    return distance, isExistDst
定义根页面为index.html(实际上演示也只需要这一个页面)。
@app.route('/', methods=['GET', 'POST'])
def root():
    return render_template("index.html")
定义/predict路由,对从request获取到的两张图片进行分析,将结果传递给前端。
@app.route("/predict", methods=["GET", "POST"])
@torch.no_grad()
def predict():
    info = {}
    try:
        image1 = request.files["file0"]
        image2 = request.files["file1"]
        img_bytes1, img_bytes2 = image1.read(), image2.read()
        image1, image2 = Image.open(io.BytesIO(img_bytes1)), Image.open(io.BytesIO(img_bytes2))
        image_path1, image_path2 = './data/a.png', './data/b.png'
        image1.save(image_path1)
        image2.save(image_path2)
        mtcnn = MTCNN(min_face_size=12, thresholds=[0.2, 0.2, 0.3], keep_all=True, device=device)
        # InceptionResnetV1模型加载【用于获取人脸特征向量】
        resnet = InceptionResnetV1(pretrained='vggface2').eval().to(device)
        MatchThreshold = 0.8  # 人脸特征向量匹配阈值设置

        known_faces_emb, _ = load_known_faces(image_path1, mtcnn, resnet)  # 已知人物图
        # bFaceThin.png  lyf2.jpg
        faces_emb, img = load_known_faces(image_path2, mtcnn, resnet)  # 待检测人物图
        distance, isExistDst = match_faces(faces_emb, known_faces_emb, MatchThreshold)  # 人脸匹配
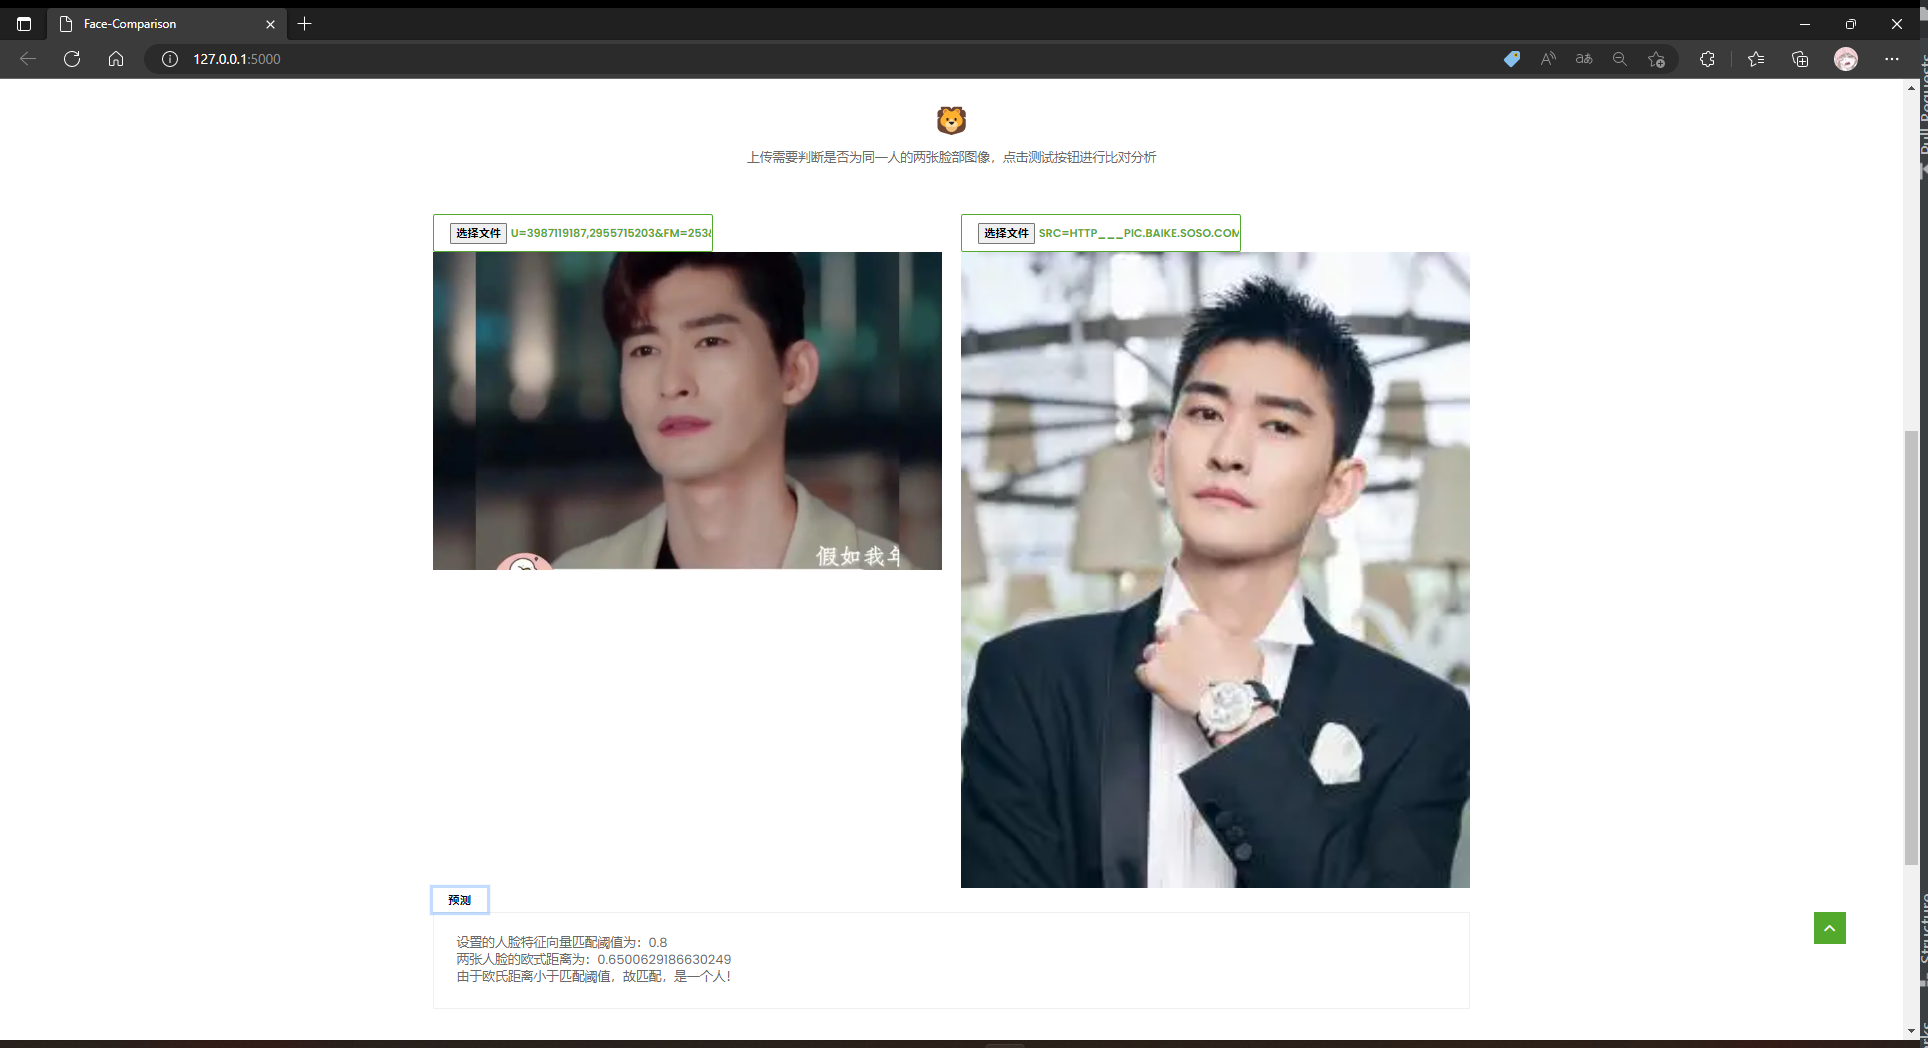
        info["oushi"] = "两张人脸的欧式距离为:{}".format(distance)
        info["fazhi"] = "设置的人脸特征向量匹配阈值为:{}".format(MatchThreshold)
        print("OK")
        if isExistDst:
            boxes, prob, landmarks = mtcnn.detect(img, landmarks=True)  # 返回人脸框,概率,5个人脸关键点
            info["result"] = '由于欧氏距离小于匹配阈值,匹配!该判断方式下是一个人!'
        else:
            info["result"] = '由于欧氏距离大于匹配阈值,不匹配!该判断方式下不是一个人!'
    except Exception as e:
        info["err"] = str(e)
    return jsonify(info)  # json格式传至前端
演示界面
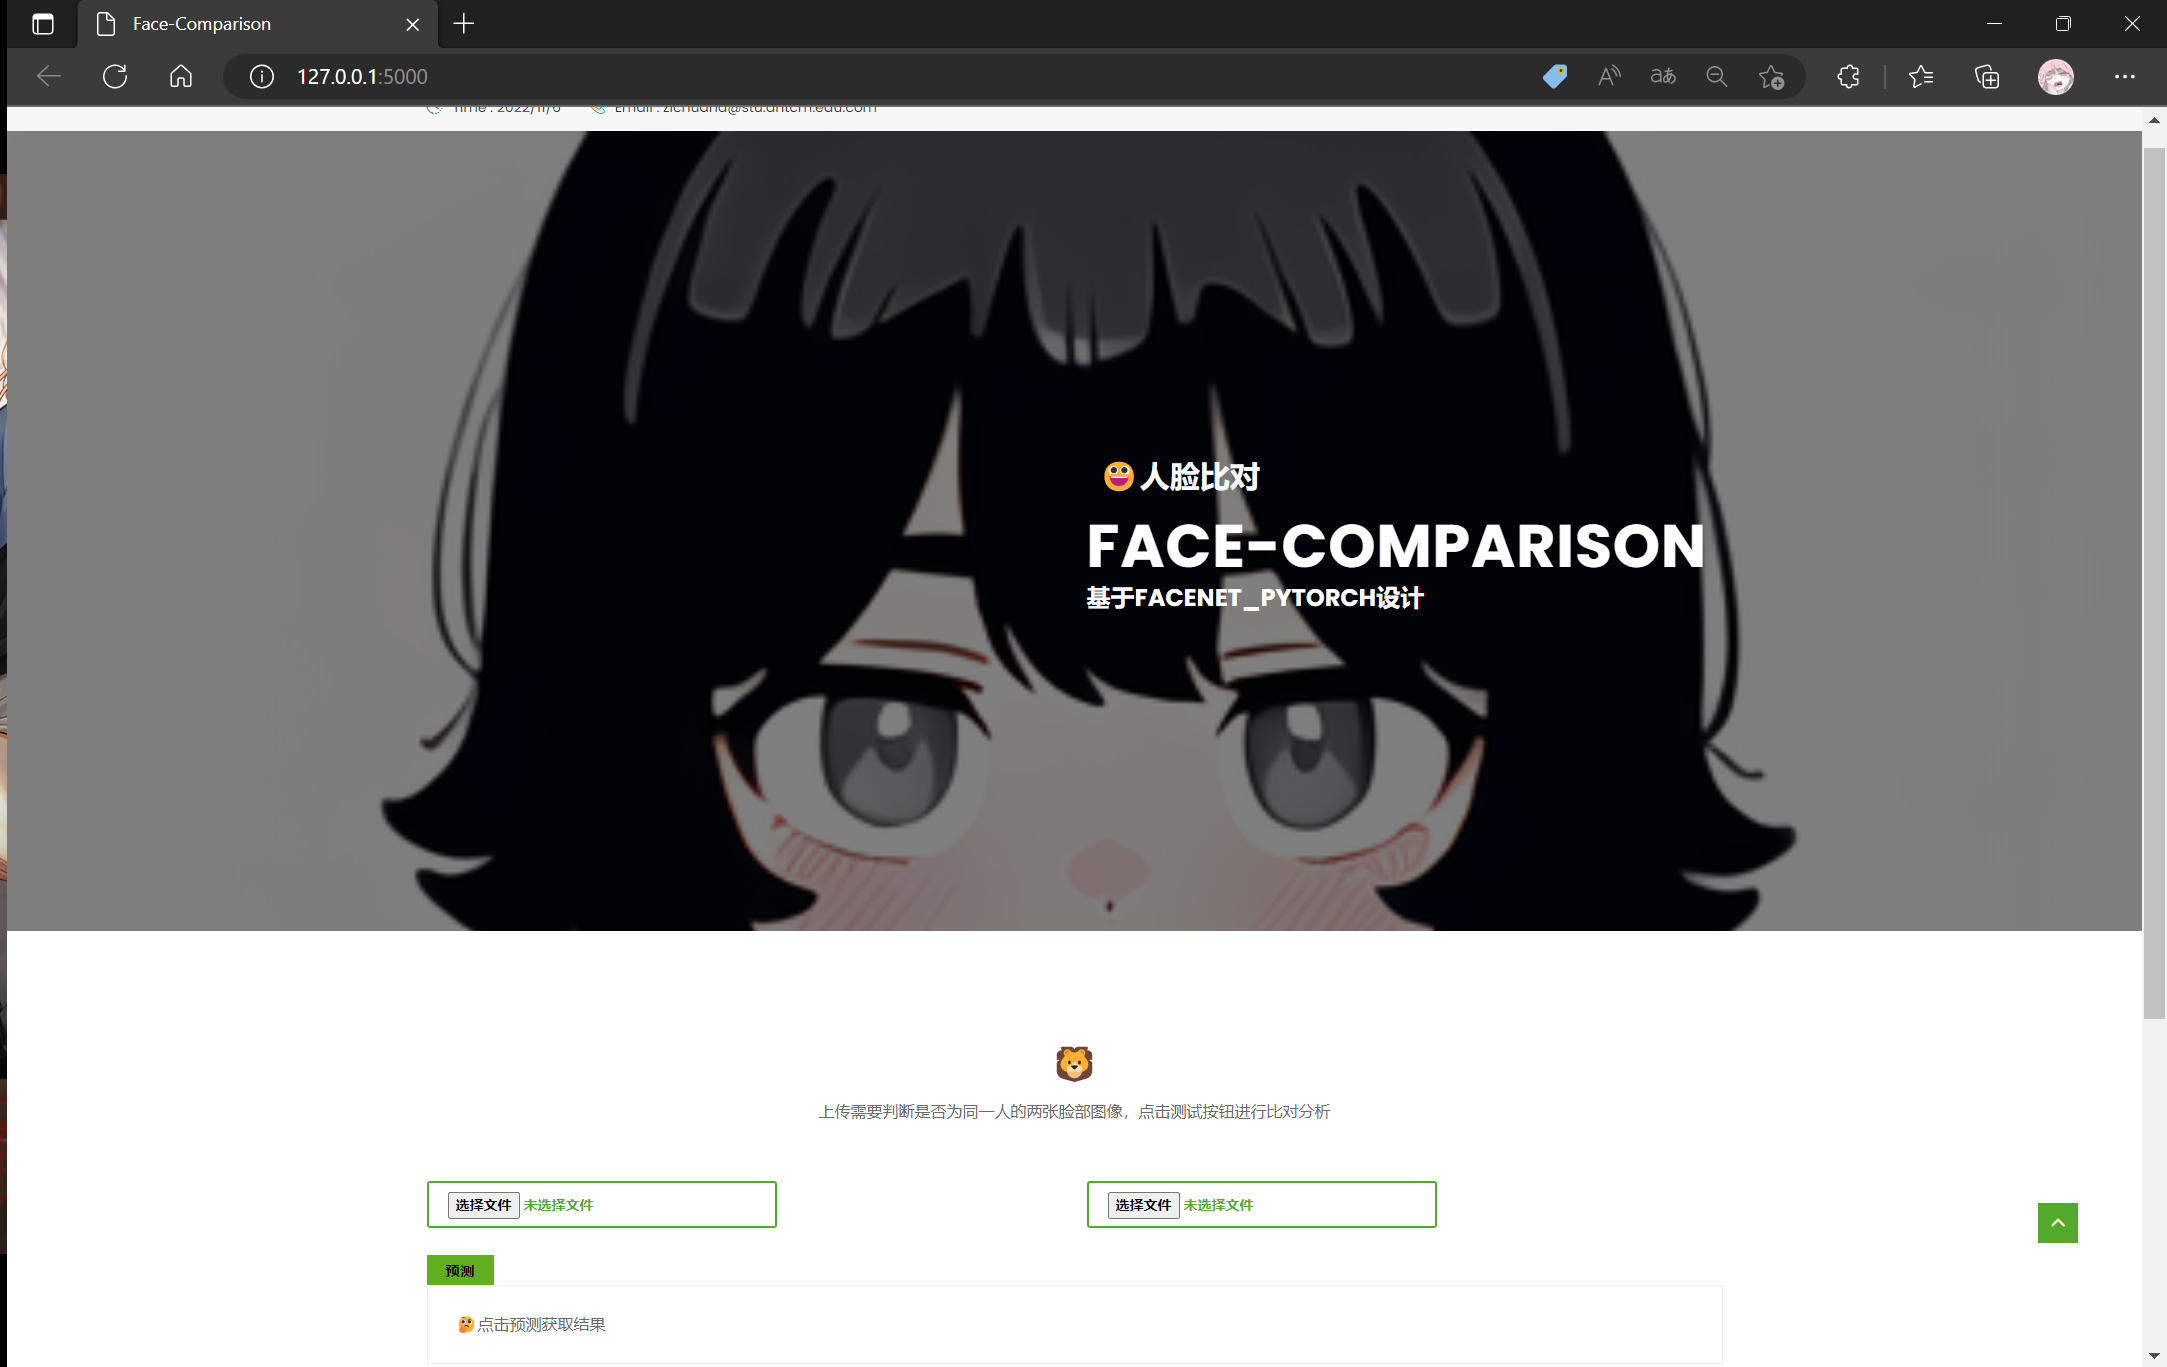
随便下载一个html模板,目录结构如下保留静态文件夹static内的内容。

这里data文件夹暂存前端获取到的图片,以便可能进行的处理。
index.html文件可以直接套用模板,在模板中添加所需内容。
通过input获取图像到两张需要传入进行比对的图片,初始化展示结果的方框。这里的布局以及按钮框的类型class仿照模板编写。以实现点击按钮调用test0(),将图像传给后端,并获取结果。
<!-- Start Upcoming Events Section -->
<section class="bg-upcoming-events">
<div class="container">
<div class="row">
<div class="upcoming-events">
<div class="section-header">
<h2>🦁</h2>
<p>上传需要判断是否为同一人的两张脸部图像,点击测试按钮进行比对分析</p>
</div>
<!-- .section-header -->
<div class="row">
<div class="col-lg-6">
<div>
<!-- href="javascript:;"-->
<input href="javascript:;" class="btn btn-default" tabindex="0" type="file" name="file"
id="file0">
</input>
<p></p>
<img src="" id="img0">
</div>
</div>
<!-- .col-lg-6 -->
<div class="col-lg-6">
<div>
<!-- href="javascript:;"-->
<input href="javascript:;" class="btn btn-default" tabindex="0" type="file" name="file"
id="file1">
</input>
<p></p>
<img src="" id="img1">
</div>
</div>
<!-- .col-lg-6 -->
<p></p>
<div>
<!-- style="margin-top:20px;width: 35rem;height: 30rem; padding-left: 20px"-->
<input class="btn btn-default" type="button" id="b0"
onclick="test0()" style="color: #000000"
value="预测">
<p></p>
<pre id="out">🤔点击预测获取结果</pre>
<!-- <pre id="out" style="width:320px;height:50px;line-height: 50px;margin-top:20px;"></pre>-->
</div>
</div>
<!-- .row -->
</div>
<!-- .upcoming-events -->
</div>
<!-- .row -->
</div>
<!-- .container -->
</section>
<!-- End Upcoming Events Section -->s
在末尾加上<script>元素,编写test0()功能,将图片img0与img1传递给后端。
<script type="text/javascript">
    $("#file0").change(function () {
        var objUrl = getObjectURL(this.files[0]);//获取文件信息
        console.log("objUrl = " + objUrl);
        if (objUrl) {
            $("#img0").attr("src", objUrl);
        }
    });
    $("#file1").change(function () {
        var objUrl = getObjectURL(this.files[0]);//获取文件信息
        console.log("objUrl = " + objUrl);
        if (objUrl) {
            $("#img1").attr("src", objUrl);
        }
    });

    function test0() {
        var fileobj0 = $("#file0")[0].files[0];
        var fileobj1 = $("#file1")[0].files[0];
        var form = new FormData();
        form.append("file0", fileobj0);
        form.append("file1", fileobj1);
        var out = '';
        var fazhi = '';
        var oushi = '';
        $.ajax({
            type: 'POST',
            url: "predict",
            data: form,
            async: false,       //同步执行
            processData: false, // 告诉jquery要传输data对象
            contentType: false, //告诉jquery不需要增加请求头对于contentType的设置
            success: function (arg) {
                console.log(arg)
                out = arg.fazhi + '\n' + arg.oushi + '\n' + arg.result
                err = arg.err
            }, error: function () {
                console.log("后台处理错误");
            }
        });

        // if(oushi!==undefined){document.getElementById("oushi").innerText = oushi;}
        // if(fazhi!==undefined){document.getElementById("fazhi").innerText = fazhi;}
        if (err !== undefined) {
            document.getElementById("out").innerText = err;
        }
        if (out !== undefined) {
            document.getElementById("out").innerHTML = out;
        }

    }

    function getObjectURL(file) {
        var url = null;
        if (window.createObjectURL != undefined) {
            url = window.createObjectURL(file);
        } else if (window.URL != undefined) { // mozilla(firefox)
            url = window.URL.createObjectURL(file);
        } else if (window.webkitURL != undefined) { // webkit or chrome
            url = window.webkitURL.createObjectURL(file);
        }
        return url;
    }
</script>