基于pytorch,flask的皮肤病类别预测demo
事情的起因是它

虽然成为了我的小宝贝,但是它只就是个放大镜!!!想看的都看不到,在一次偶然留意到kaggle上的公开数据集:
https://www.kaggle.com/datasets/salviohexia/isic-2019-skin-lesion-images-for-classification
数据样本长这样:

看这根放大的毛毛就知道小宝贝终于有它的用武之地了!
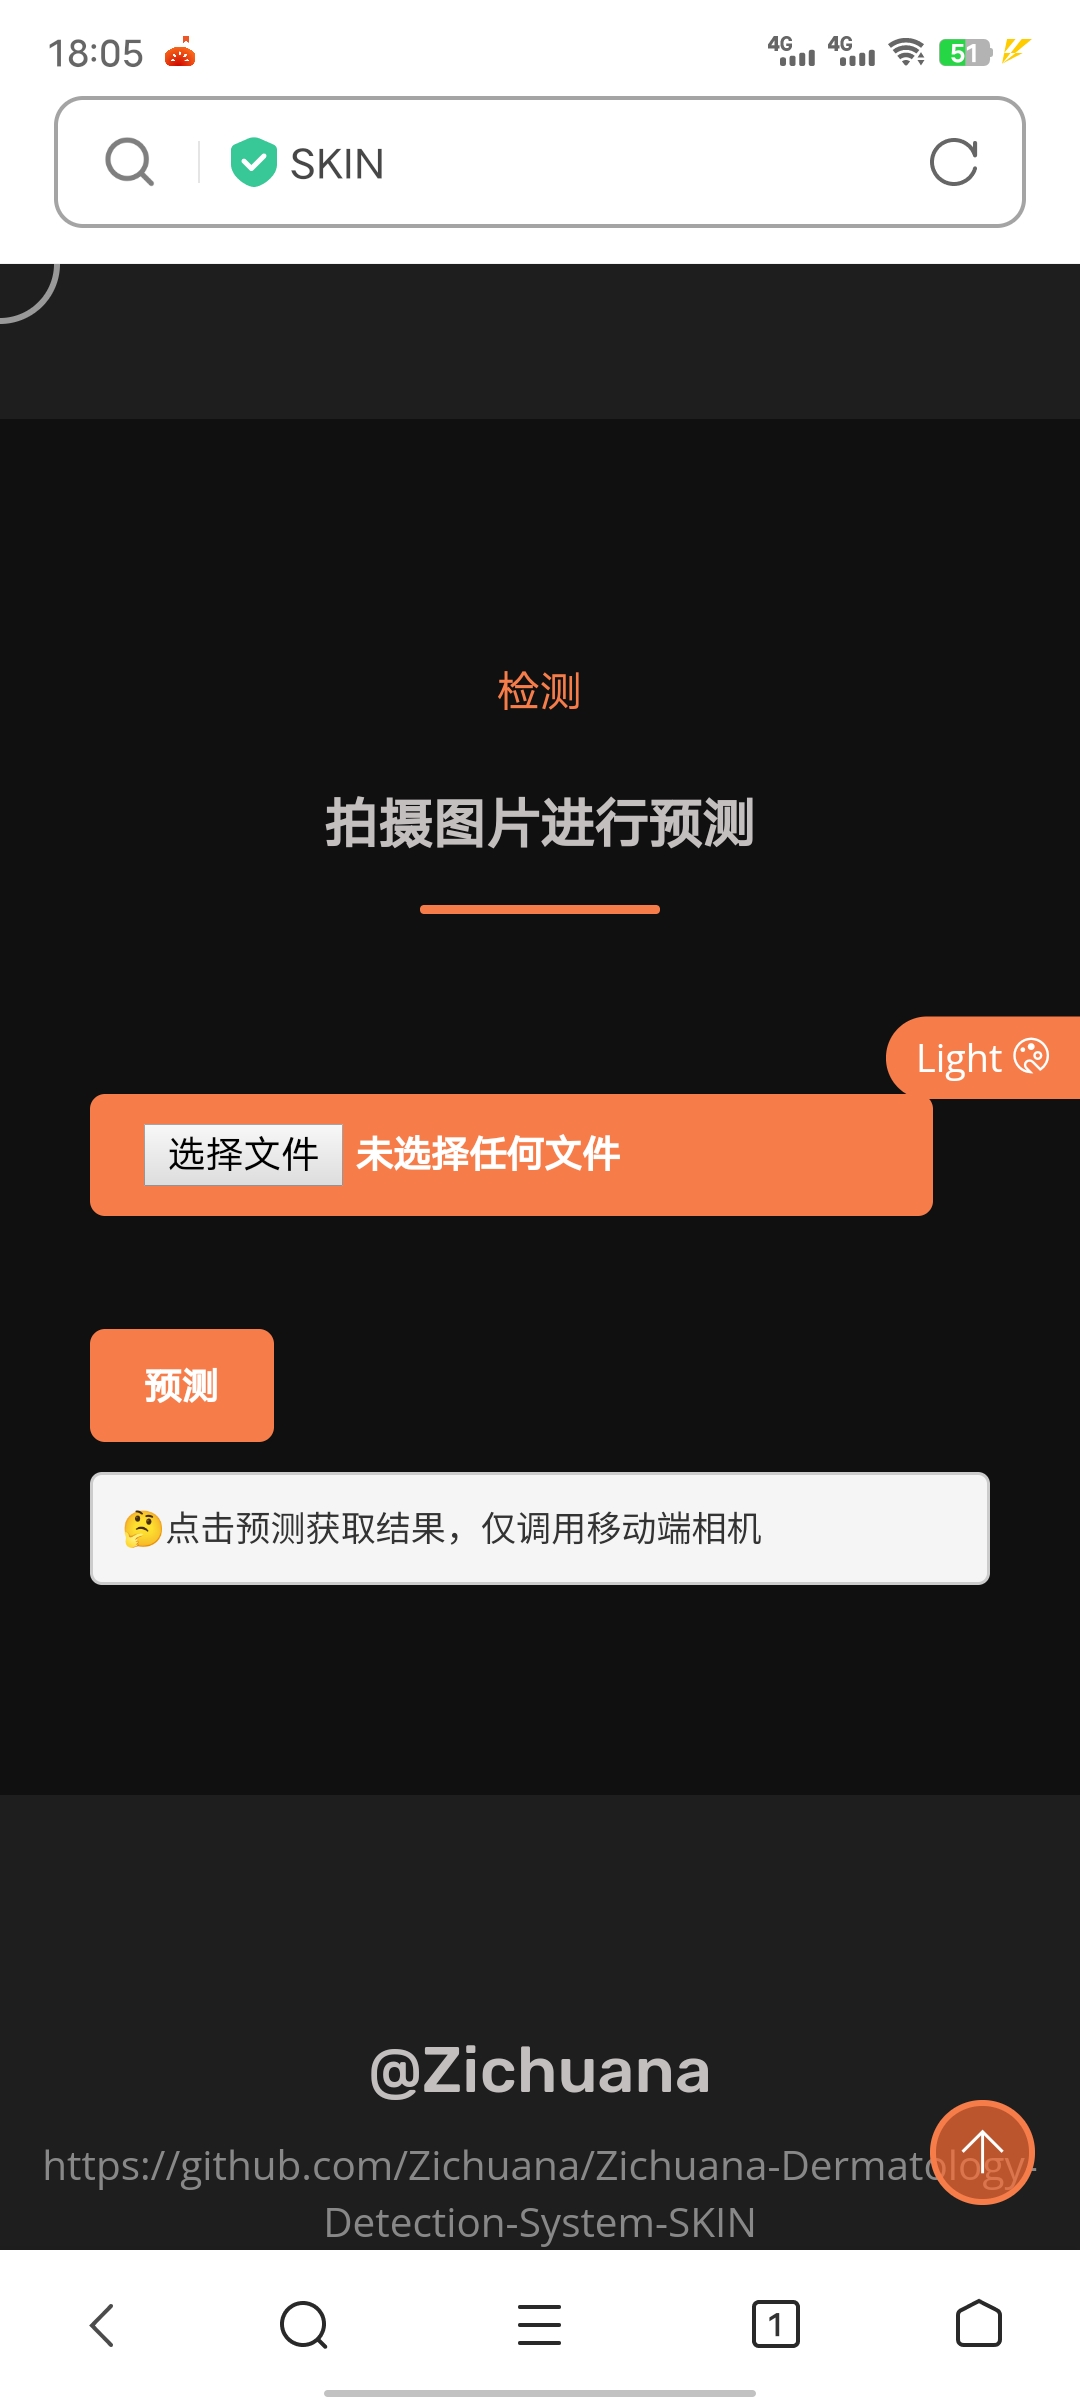
做出来的demo长这样:


结合小宝贝拍摄我家阿黄的一颗痣
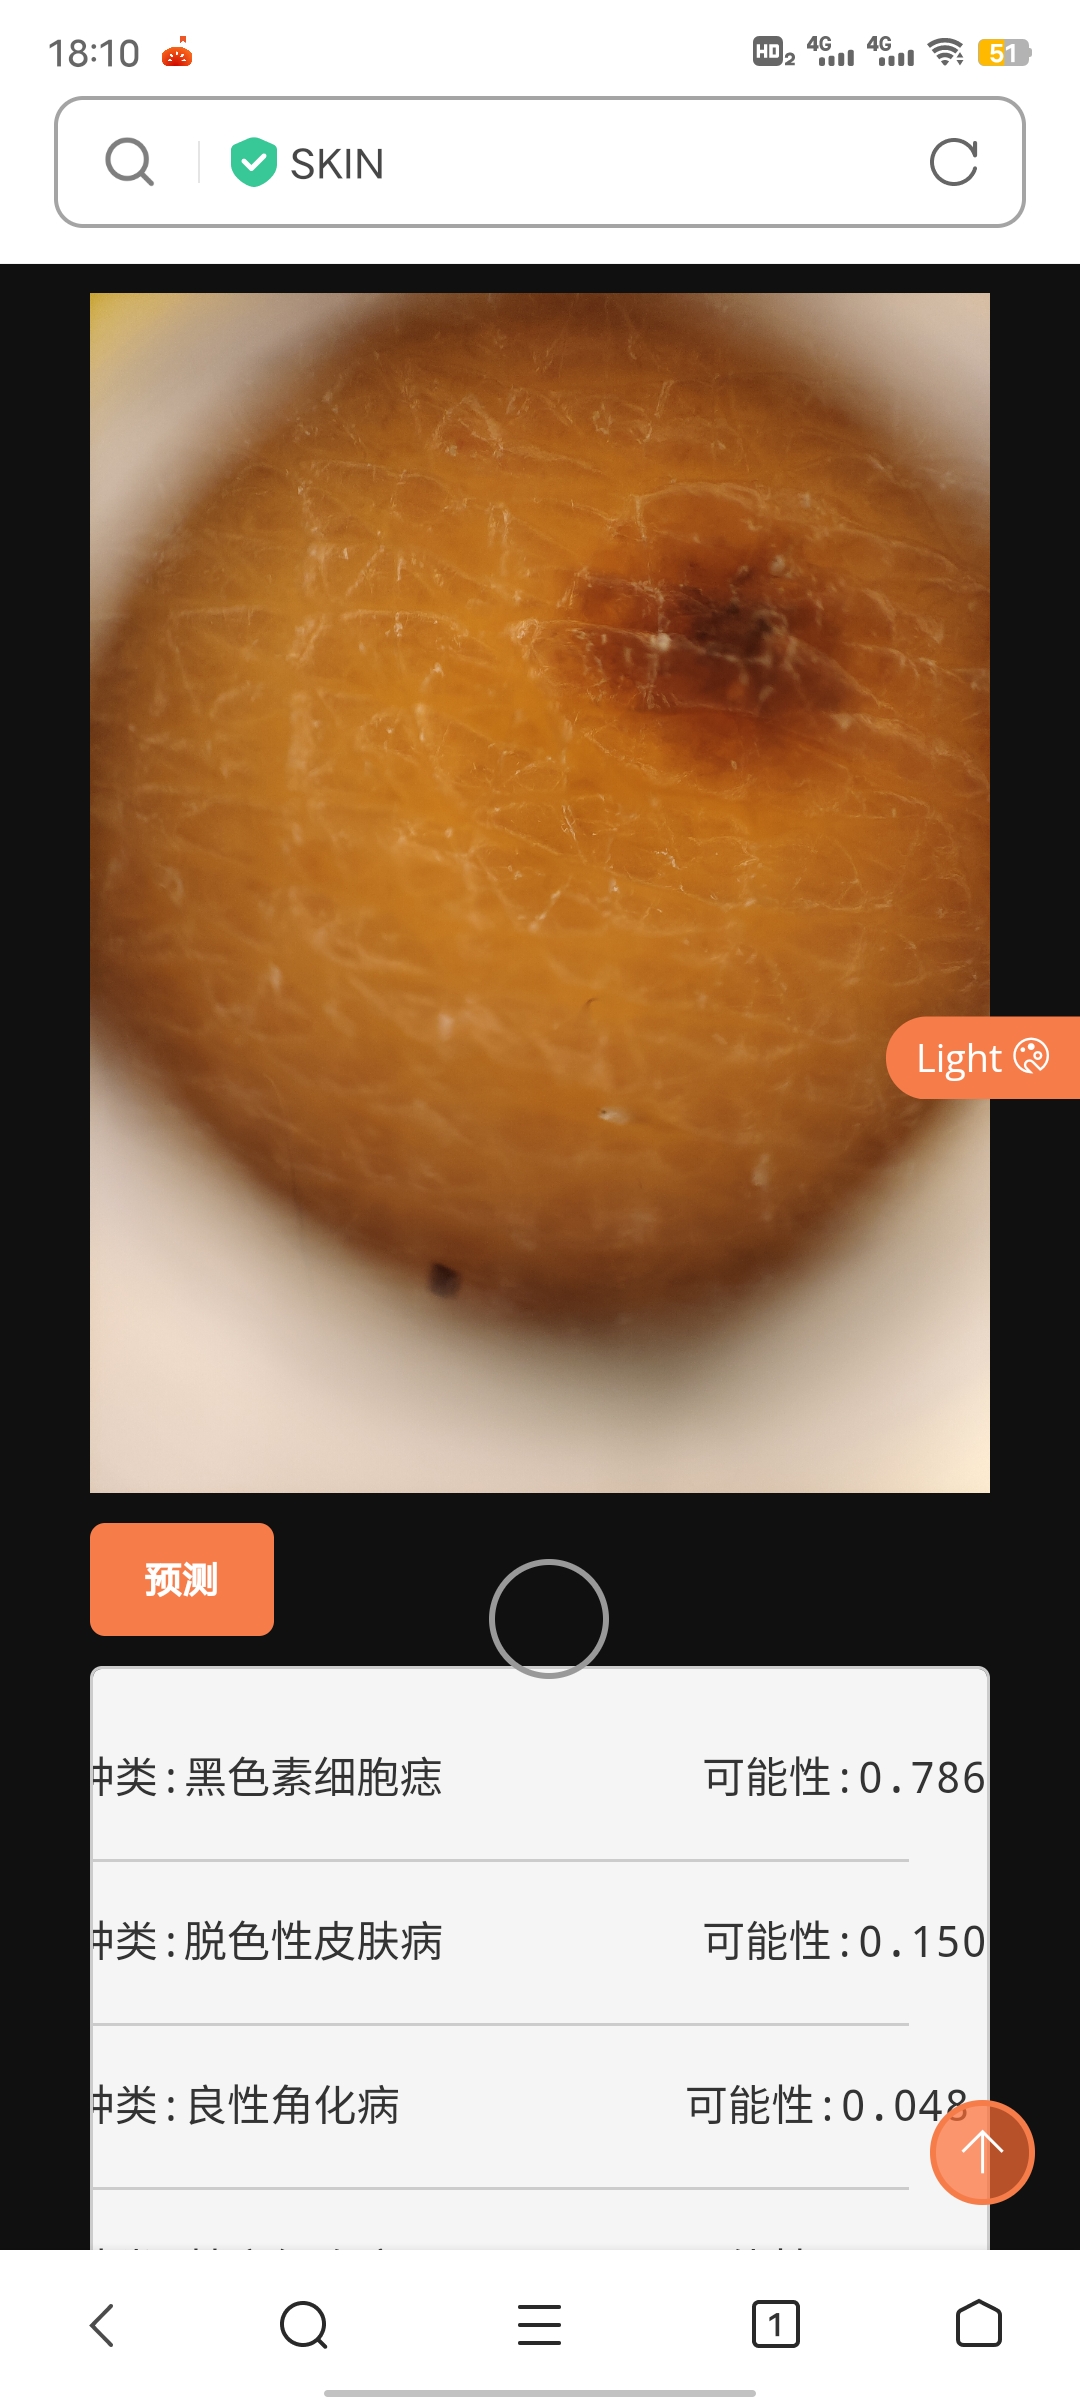
就这样,不用半天一个简单的小项目(zuoye)就完成啦!
贴上制作源码:
https://github.com/Zichuana/Dermatology-Detection-System-SKIN
简要概述制作流程
模型的训练
train.py
数据集内分布如下:
DATA:
├─AK
├─BCC
├─BKL
├─DF
├─MEL
├─NV
├─SCC
└─VASC
分类模型首选ResNet! 导入所需要的库
from model import resnet34
import torch
from torchvision import transforms, datasets
import torch.utils.data.dataloader as Data
import torchvision
import torch.optim as optim
from torch.utils.tensorboard import SummaryWriter
import torch.utils.data as D
import os
import random
from tqdm import tqdm
from PIL import Image
import json
import torch.nn as nn
import sys
编写可用于数据集划分(训练集,验证集)函数
def data_split(full_list, ratio, shuffle=False):
    """
    数据集拆分: 将列表full_list按比例ratio(随机)划分为2个子列表sublist_1与sublist_2
    :param full_list: 数据列表
    :param ratio:     子列表1
    :param shuffle:   子列表2
    :return:
    """
    n_total = len(full_list)
    offset = int(n_total * ratio)
    if n_total == 0 or offset < 1:
        return [], full_list
    if shuffle:
        random.shuffle(full_list)
    sublist_1 = full_list[:offset]
    sublist_2 = full_list[offset:]
    return sublist_1, sublist_2
进行数据集的划分(我的奇怪的shi代码出现了,sklearn可以直接解决这些问题)
cla_dict = {'AK': '光化性角化病', 'BCC': '基底细胞癌', 'BKL': '良性角化病', 'DF': '皮肤纤维瘤', 'MEL': '脱色性皮肤病',
            'NV': '黑色素细胞痣', 'SCC': '鳞状细胞癌', 'VASC': '血管病变'}
json_str = json.dumps(cla_dict, indent=8, ensure_ascii=False)
print(json_str)
with open('class_indices.json', 'w') as json_file:
    json_file.write(json_str)

transform = transforms.Compose([
    transforms.Resize((224, 224)),
    torchvision.transforms.ToTensor(),
    transforms.Normalize([0.5, 0.5, 0.5], [0.5, 0.5, 0.5])])

data = datasets.ImageFolder(root=os.path.join('../DATA/SKIN'),
                            transform=transform)
print(len(data))

train_data, val_data, test_data = [], [], []
test_txt = []
labels = {'AK': 0, 'BCC': 1, 'BKL': 2, 'DF': 3, 'MEL': 4, 'NV': 5, 'SCC': 6, 'VASC': 7}
skin_str = ['AK', 'BCC', 'BKL', 'DF', 'MEL', 'NV', 'SCC', 'VASC']
for label in labels:
    print(label)
    files_path = '../DATA/SKIN/' + label
    files_list = os.listdir(files_path)
    print(len(files_list))
    # train_file, test_file = data_split(files_list, 0.8)
    # test_file, val_file = data_split(test_val_file, 0.5)
    # print(len(train_file), len(test_file), len(val_file))
    train_file, val_file = data_split(files_list, 0.8)
    print(len(train_file), len(val_file))
    for file in train_file:
        img = Image.open('../DATA/SKIN/' + label + '/' + file)
        img = transform(img)
        train_data.append(tuple([img, torch.tensor(labels[label])]))
    for file in val_file:
        img = Image.open('../DATA/SKIN/' + label + '/' + file)
        img = transform(img)
        val_data.append(tuple([img, torch.tensor(labels[label])]))
    # for file in test_file:
    #     img = Image.open('../DATA/SKIN/' + label + '/' + file)
    #     test_txt.append([file, labels[label]])
    #     img = transform(img)
    #     test_data.append(tuple([img, torch.tensor(labels[label])]))

with open('data3.txt', 'w') as f:
    for i in test_txt:
        f.write(str(i[0]) + ' ' + str(i[1]))
        f.write('\r\n')
f.close()

print("train, val", len(train_data), len(val_data))
train_loader = Data.DataLoader(dataset=train_data, batch_size=32, shuffle=True, drop_last=True)
val_loader = Data.DataLoader(dataset=val_data, batch_size=16, shuffle=False, drop_last=True)
设备选取
device = torch.device("cuda:0" if torch.cuda.is_available() else "cpu")
print("device:", device)
导入模型,这里用到了resnet的预训练模型。
下载链接: https://download.pytorch.org/models/resnet34-333f7ec4.pth
注意!这里是八分类预测,如将模型用到其它地方net.fc = nn.Linear(in_channel, 8) 将其修改为对应的数值。
net = resnet34()
net.to(device)

model_weight_path = './resnet34-pre.pth'
assert os.path.exists(model_weight_path), "file {} does not exist.".format(model_weight_path)
net.load_state_dict(torch.load(model_weight_path, map_location=device))
for param in net.parameters():
    param.requires_grad = False

in_channel = net.fc.in_features
net.fc = nn.Linear(in_channel, 8)

loss_function = nn.CrossEntropyLoss()
params = [p for p in net.parameters() if p.requires_grad]
optimizer = optim.Adam(params, lr=1e-3)
训练十次意思一下
epochs = 10
best_acc = 0.0
save_path = 'ResNet34_0.613.pth'
train_steps = len(train_loader)
val_steps = len(val_loader)
summaryWriter = SummaryWriter(log_dir="./log/log_34_epoch_10")
for epoch in range(epochs):
    net.train()
    running_loss = 0.0
    train_bar = tqdm(train_loader, file=sys.stdout)
    for step, data in enumerate(train_bar):
        images, labels = data
        optimizer.zero_grad()
        logits = net(images.to(device))
        loss = loss_function(logits, labels.to(device))
        loss.backward()
        optimizer.step()

        running_loss += loss.item()

        train_bar.desc = "train epoch[{}/{}] loss:{:.3f}".format(epoch + 1,
                                                                 epochs,
                                                                 loss)

    net.eval()
    acc = 0.0
    running_val_loss = 0.0
    with torch.no_grad():
        val_bar = tqdm(val_loader, file=sys.stdout)
        for data in val_bar:
            val_images, val_labels = data
            outputs = net(val_images.to(device))
            val_loss = loss_function(outputs, val_labels.to(device))
            running_val_loss += val_loss.item()
            predict_y = torch.max(outputs, dim=1)[1]
            acc += torch.eq(predict_y, val_labels.to(device)).sum().item()

            val_bar.desc = "valid epoch[{}/{}]".format(epoch + 1,
                                                       epochs)
    val_accurate = acc / len(val_data)
    print('[epoch %d] train_loss: %.3f  val_accuracy: %.3f' %
          (epoch + 1, running_loss / train_steps, val_accurate))

    if val_accurate > best_acc:
        best_acc = val_accurate
        torch.save(net.state_dict(), save_path)

    summaryWriter.add_scalars("epoch_loss", {"train_loss": running_loss / train_steps,
                                             "val_loss": running_val_loss / val_steps}, epoch + 1)
    summaryWriter.add_scalars("epoch_acc", {"acc": val_accurate}, epoch + 1)

print("val best acc", best_acc)
print('Finished Training!')
训练过程使用tensorboard绘制损失值,但我并没留意,主要跑个大概,最后准确率在70%左右,意思意思嗯嗯。如有需要绘制结果保存在log文件夹下(不出意外的情况下,结果很垃),可进行多次训练调整参数epoch,lr,batch_size。
model.py
import torch.nn as nn
import torch


class BasicBlock(nn.Module):
    expansion = 1

    def __init__(self, in_channel, out_channel, stride=1, downsample=None, **kwargs):
        super(BasicBlock, self).__init__()
        self.conv1 = nn.Conv2d(in_channels=in_channel, out_channels=out_channel,
                               kernel_size=3, stride=stride, padding=1, bias=False)
        self.bn1 = nn.BatchNorm2d(out_channel)
        self.relu = nn.ReLU()
        self.conv2 = nn.Conv2d(in_channels=out_channel, out_channels=out_channel,
                               kernel_size=3, stride=1, padding=1, bias=False)
        self.bn2 = nn.BatchNorm2d(out_channel)
        self.downsample = downsample

    def forward(self, x):
        identity = x
        if self.downsample is not None:
            identity = self.downsample(x)

        out = self.conv1(x)
        out = self.bn1(out)
        out = self.relu(out)

        out = self.conv2(out)
        out = self.bn2(out)

        out += identity
        out = self.relu(out)

        return out


class Bottleneck(nn.Module):
    """
    注意:原论文中,在虚线残差结构的主分支上,第一个1x1卷积层的步距是2,第二个3x3卷积层步距是1。
    但在pytorch官方实现过程中是第一个1x1卷积层的步距是1,第二个3x3卷积层步距是2,
    这么做的好处是能够在top1上提升大概0.5%的准确率。
    可参考Resnet v1.5 https://ngc.nvidia.com/catalog/model-scripts/nvidia:resnet_50_v1_5_for_pytorch
    """
    expansion = 4

    def __init__(self, in_channel, out_channel, stride=1, downsample=None,
                 groups=1, width_per_group=64):
        super(Bottleneck, self).__init__()

        width = int(out_channel * (width_per_group / 64.)) * groups

        self.conv1 = nn.Conv2d(in_channels=in_channel, out_channels=width,
                               kernel_size=1, stride=1, bias=False)  # squeeze channels
        self.bn1 = nn.BatchNorm2d(width)
        # -----------------------------------------
        self.conv2 = nn.Conv2d(in_channels=width, out_channels=width, groups=groups,
                               kernel_size=3, stride=stride, bias=False, padding=1)
        self.bn2 = nn.BatchNorm2d(width)
        # -----------------------------------------
        self.conv3 = nn.Conv2d(in_channels=width, out_channels=out_channel*self.expansion,
                               kernel_size=1, stride=1, bias=False)  # unsqueeze channels
        self.bn3 = nn.BatchNorm2d(out_channel*self.expansion)
        self.relu = nn.ReLU(inplace=True)
        self.downsample = downsample

    def forward(self, x):
        identity = x
        if self.downsample is not None:
            identity = self.downsample(x)

        out = self.conv1(x)
        out = self.bn1(out)
        out = self.relu(out)

        out = self.conv2(out)
        out = self.bn2(out)
        out = self.relu(out)

        out = self.conv3(out)
        out = self.bn3(out)

        out += identity
        out = self.relu(out)

        return out


class ResNet(nn.Module):

    def __init__(self,
                 block,
                 blocks_num,
                 num_classes=1000,
                 include_top=True,
                 groups=1,
                 width_per_group=64):
        super(ResNet, self).__init__()
        self.include_top = include_top
        self.in_channel = 64

        self.groups = groups
        self.width_per_group = width_per_group

        self.conv1 = nn.Conv2d(3, self.in_channel, kernel_size=7, stride=2,
                               padding=3, bias=False)
        self.bn1 = nn.BatchNorm2d(self.in_channel)
        self.relu = nn.ReLU(inplace=True)
        self.maxpool = nn.MaxPool2d(kernel_size=3, stride=2, padding=1)
        self.layer1 = self._make_layer(block, 64, blocks_num[0])
        self.layer2 = self._make_layer(block, 128, blocks_num[1], stride=2)
        self.layer3 = self._make_layer(block, 256, blocks_num[2], stride=2)
        self.layer4 = self._make_layer(block, 512, blocks_num[3], stride=2)
        if self.include_top:
            self.avgpool = nn.AdaptiveAvgPool2d((1, 1))  # output size = (1, 1)
            self.fc = nn.Linear(512 * block.expansion, num_classes)

        for m in self.modules():
            if isinstance(m, nn.Conv2d):
                nn.init.kaiming_normal_(m.weight, mode='fan_out', nonlinearity='relu')

    def _make_layer(self, block, channel, block_num, stride=1):
        downsample = None
        if stride != 1 or self.in_channel != channel * block.expansion:
            downsample = nn.Sequential(
                nn.Conv2d(self.in_channel, channel * block.expansion, kernel_size=1, stride=stride, bias=False),
                nn.BatchNorm2d(channel * block.expansion))

        layers = []
        layers.append(block(self.in_channel,
                            channel,
                            downsample=downsample,
                            stride=stride,
                            groups=self.groups,
                            width_per_group=self.width_per_group))
        self.in_channel = channel * block.expansion

        for _ in range(1, block_num):
            layers.append(block(self.in_channel,
                                channel,
                                groups=self.groups,
                                width_per_group=self.width_per_group))

        return nn.Sequential(*layers)

    def forward(self, x):
        x = self.conv1(x)
        x = self.bn1(x)
        x = self.relu(x)
        x = self.maxpool(x)

        x = self.layer1(x)
        x = self.layer2(x)
        x = self.layer3(x)
        x = self.layer4(x)

        if self.include_top:
            x = self.avgpool(x)
            x = torch.flatten(x, 1)
            x = self.fc(x)

        return x


def resnet34(num_classes=1000, include_top=True):
    # https://download.pytorch.org/models/resnet34-333f7ec4.pth
    return ResNet(BasicBlock, [3, 4, 6, 3], num_classes=num_classes, include_top=include_top)


def resnet50(num_classes=1000, include_top=True):
    # https://download.pytorch.org/models/resnet50-19c8e357.pth
    return ResNet(Bottleneck, [3, 4, 6, 3], num_classes=num_classes, include_top=include_top)


def resnet101(num_classes=1000, include_top=True):
    # https://download.pytorch.org/models/resnet101-5d3b4d8f.pth
    return ResNet(Bottleneck, [3, 4, 23, 3], num_classes=num_classes, include_top=include_top)


def resnext50_32x4d(num_classes=1000, include_top=True):
    # https://download.pytorch.org/models/resnext50_32x4d-7cdf4587.pth
    groups = 32
    width_per_group = 4
    return ResNet(Bottleneck, [3, 4, 6, 3],
                  num_classes=num_classes,
                  include_top=include_top,
                  groups=groups,
                  width_per_group=width_per_group)


def resnext101_32x8d(num_classes=1000, include_top=True):
    # https://download.pytorch.org/models/resnext101_32x8d-8ba56ff5.pth
    groups = 32
    width_per_group = 8
    return ResNet(Bottleneck, [3, 4, 23, 3],
                  num_classes=num_classes,
                  include_top=include_top,
                  groups=groups,
                  width_per_group=width_per_group)
模型训练完成后取最高准确率,保存模型权重,预测时还需要用到model.py。
class_indices.json
内容如下:
{
        "AK": "光化性角化病",
        "BCC": "基底细胞癌",
        "BKL": "良性角化病",
        "DF": "皮肤纤维瘤",
        "MEL": "脱色性皮肤病",
        "NV": "黑色素细胞痣",
        "SCC": "鳞状细胞癌",
        "VASC": "血管病变"
}
看起来平平无奇(确实平平无奇),模型训练时生成,与输出结果代数对应,预测时直接获取,这个习惯可避免多次需求时,手误出现的bug。
系统的编写(抄写)
系统的使用flask框架,工作区的基本结构如下:
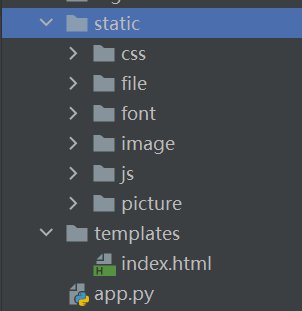
可以直接使用html模板,该demo使用的应该在这:
https://sc.chinaz.com/tag_moban/html.html
app.py
导入库,重构模型,flask项目初始化
from flask import Flask, jsonify, render_template, request
from datetime import timedelta
import torch
from model import resnet34
import torchvision.transforms as transforms
import torch.utils.data.dataloader as Data
from PIL import Image
import io
import json

app = Flask(__name__, static_url_path="/")

# 自动重载模板文件
app.jinja_env.auto_reload = True
app.config['TEMPLATES_AUTO_RELOAD'] = True
# 设置静态文件缓存过期时间
app.config['SEND_FILE_MAX_AGE_DEFAULT'] = timedelta(seconds=1)

device = torch.device("cuda:0" if torch.cuda.is_available() else "cpu")
print(device)
weights_path = './ResNet34_0.613.pth'
model = resnet34(num_classes=8).to(device)
with open("./class_indices.json", 'r', encoding='GBK') as f:
    class_indict = json.load(f)
model.load_state_dict(torch.load(weights_path, map_location=device))
编写图像处理,预测函数:
def transform_image(image_bytes):
    my_transforms = transforms.Compose([
        transforms.Resize((224, 224)),
        transforms.ToTensor(),
        transforms.Normalize([0.5, 0.5, 0.5], [0.5, 0.5, 0.5])])
    image = Image.open(io.BytesIO(image_bytes))
    if image.mode != "RGB":
        raise ValueError("input file does not RGB image...")
    return my_transforms(image).unsqueeze(0)


def get_prediction(image_bytes):
    try:
        skin_str = ['AK', 'BCC', 'BKL', 'DF', 'MEL', 'NV', 'SCC', 'VASC']
        tensor = transform_image(image_bytes=image_bytes)
        output = torch.softmax(model.forward(tensor.to(device)).squeeze(), dim=0)
        pre = output.detach().cpu().numpy()
        template = "种类:{:<15} 可能性:{:.3f}"
        index_pre = [(class_indict[str(skin_str[int(index)])], float(p)) for index, p in enumerate(pre)]
        index_pre.sort(key=lambda x: x[1], reverse=True)
        text = [template.format(k, v) for k, v in index_pre]
        return_info = {"result": text}
    except Exception as e:
        return_info = {"result": [str(e)]}
    return return_info
根页面(实际上只有这个页面)
@app.route("/", methods=["GET", "POST"])
def root():
    return render_template("index.html")
获取前端传来的二进制图像文件,路由设置为'./predict'
@app.route("/predict", methods=["GET", "POST"])
@torch.no_grad()
def predict():
    image = request.files["file"]
    img_bytes = image.read()
    info = get_prediction(image_bytes=img_bytes)
    return jsonify(info)  # json格式传至前端
index.html
对下载的模板进行处理,取其精华去其糟粕(这里用vscode直接实时删减方便)。
融合模板内容,编写获取文件与调用摄像头获取文件模块(这里摄像头移动端调用,啊只保证安卓,使用电脑依然是获取文件)
<section class="blog-section section-padding">
<div class="container">
<div class="col-l2">
<div class="section-title text-center">
<span>检测</span>
<h2>拍摄图片进行预测</h2>
</div>
</div>
<p></p>
<div class="col col-md-6 slide-caption">
<div>
<input href="javascript:;" class="theme-btn" tabindex="0" type="file" accept="image/*" capture="camera"
name="file" id="file1">
<p></p>
<img src="" id="img1">
</div>
<p></p>
<div>
<!-- style="margin-top:20px;width: 35rem;height: 30rem; padding-left: 20px"-->
<input class="theme-btn" tabindex="0" style="border: 0" type="button" id="b1" onclick="test1()"
value="预测">
<p></p>
<pre id="cam">🤔点击预测获取结果,仅调用移动端相机</pre>
<!-- <pre id="out" style="width:320px;height:50px;line-height: 50px;margin-top:20px;"></pre>-->
</div>
</div>
</div> <!-- end container -->
</section>
将图像放入form, 传递给路由./predict通过request 获取内容。
<script type="text/javascript">
    $("#file0").change(function () {
        var objUrl = getObjectURL(this.files[0]);//获取文件信息
        console.log("objUrl = " + objUrl);
        if (objUrl) {
            $("#img0").attr("src", objUrl);
        }
    });

    function test0() {
        var fileobj = $("#file0")[0].files[0];
        console.log(fileobj);
        var form = new FormData();
        form.append("file", fileobj);
        var out = '';
        var flower = '';
        $.ajax({
            type: 'POST',
            url: "predict",
            data: form,
            async: false,       //同步执行
            processData: false, // 告诉jquery要传输data对象
            contentType: false, //告诉jquery不需要增加请求头对于contentType的设置
            success: function (arg) {
                console.log(arg)
                out = arg.result;
            }, error: function () {
                console.log("后台处理错误");
            }
        });

        out.forEach(e => {
            flower += `<div style="border-bottom: 1px solid #CCCCCC;line-height: 60px;font-size:16px;">${e}</div>`
        });

        document.getElementById("out").innerHTML = flower;

    }

    function getObjectURL(file) {
        var url = null;
        if (window.createObjectURL != undefined) {
            url = window.createObjectURL(file);
        } else if (window.URL != undefined) { // mozilla(firefox)
            url = window.URL.createObjectURL(file);
        } else if (window.webkitURL != undefined) { // webkit or chrome
            url = window.webkitURL.createObjectURL(file);
        }
        return url;
    }
</script>
<script type="text/javascript">
    $("#file1").change(function () {
        var objUrl = getObjectURL(this.files[0]);//获取文件信息
        console.log("objUrl = " + objUrl);
        if (objUrl) {
            $("#img1").attr("src", objUrl);
        }
    });

    function test1() {
        var fileobj = $("#file1")[0].files[0];
        console.log(fileobj);
        var form = new FormData();
        form.append("file", fileobj);
        var out = '';
        var flower = '';
        $.ajax({
            type: 'POST',
            url: "predict",
            data: form,
            async: false,       //同步执行
            processData: false, // 告诉jquery要传输data对象
            contentType: false, //告诉jquery不需要增加请求头对于contentType的设置
            success: function (arg) {
                console.log(arg)
                out = arg.result;
            }, error: function () {
                console.log("后台处理错误");
            }
        });

        out.forEach(e => {
            flower += `<div style="border-bottom: 1px solid #CCCCCC;line-height: 60px;font-size:16px;">${e}</div>`
        });

        document.getElementById("cam").innerHTML = flower;

    }

    function getObjectURL(file) {
        var url = null;
        if (window.createObjectURL != undefined) {
            url = window.createObjectURL(file);
        } else if (window.URL != undefined) { // mozilla(firefox)
            url = window.URL.createObjectURL(file);
        } else if (window.webkitURL != undefined) { // webkit or chrome
            url = window.webkitURL.createObjectURL(file);
        }
        return url;
    }
</script>
完成后,app.py 自定义端口号,终端运行python app.py获得ip,在同意局域网内访问ip:端口号,即可进行演示。
if __name__ == '__main__':
    app.run(host="0.0.0.0", port=1234)
一个简单又不敷衍的小项目就over了!!!